TRAIN TRACK® Web Edition Help Manual
Automatic Email Notices
You may set up automatic email notices to notify employees, suporvisors and other individuals of training due or scheduled, or signatures due. You may also send notices to new employees. You may set the number of days to repeat notices and replace the default message with your own message.
The following notice types are available:
- Notices of Training Due to Employees, Supervisors, or a List of Recipients. A notice will be sent to each employee listing all training they are required to complete and have not yet completed. A notice will be sent to each supervisor listing all training their subordinates need to complete, and a notice will be sent to a list of recipients listing all training due.
- Notices of Training Scheduled to Employees or Supervisors. A notice will be sent to each employee listing their scheduled classes. Notices include the ability to add the class to their calendar. A notice will be sent to each supervisor listing scheduled classes for their subordinates.
- Notices of Signatures Due to Approvers. A notice will be sent to each document approver listing documents they are required to sign and have not yet signed.
- Notices to New Employees. A notice will be sent to new employees with their login information. Make sure you have set your default user name and password before enabling email to new employees.
NOTE: If you have a HOSTED or CLOUD edition, we will set up automatic email for you, but you can indicate which notices to send and how often.
Configure Automatic Email
To set up your application to send automatic email notices, you need to configure your email server. This is the mail server that will be used to send the email notices. Once your mail server is configured and you have indicated which messages to send, they will begin sending when your scheduled job runs, or you can send them using "Send Main Now" (see below).
To configure your server, follow these steps
| Step | Illustration |
| 1. From the menu bar, select Settings > Automatic Email. The mail server configuration screen will open. | 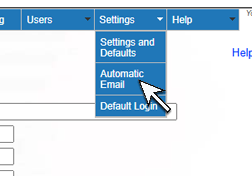 |
| 2. Type in the SMTP Server you plan to use for sending email (for example, SMTP.YourDomain.com).. | 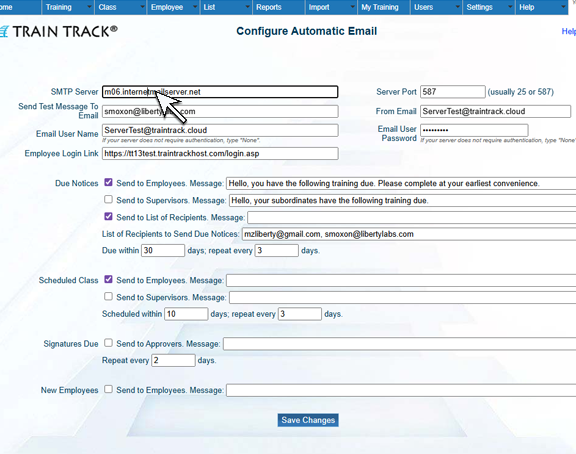 |
| 3. Type in your Server Port (usually 25 or 587). | 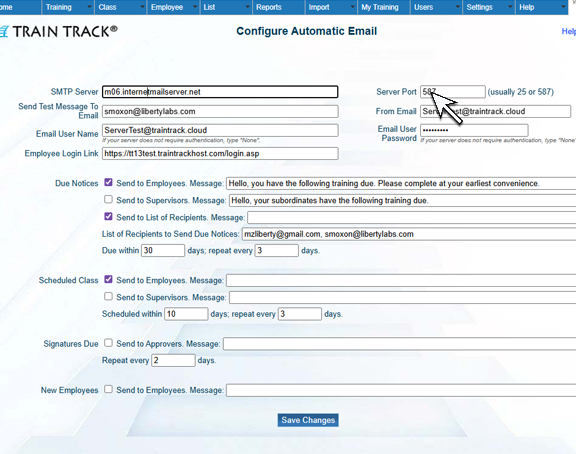 |
| 4. Type in the Email, User login name and Password for the email account you plan to use to send notices (these are usually the same). This can be an existing email account, or you can create one for sending automatic notices. | 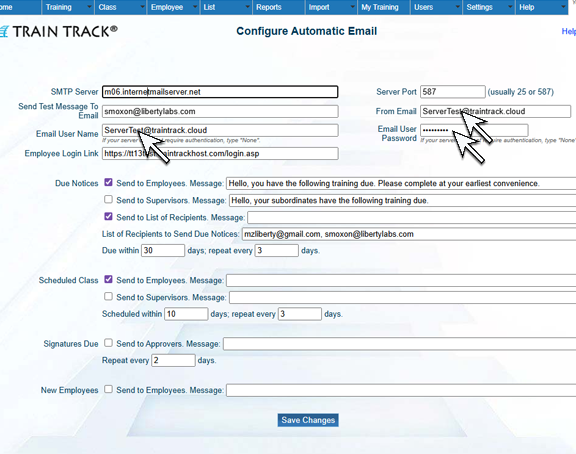 |
| 5. Type in an Email Address to send a test message to. | 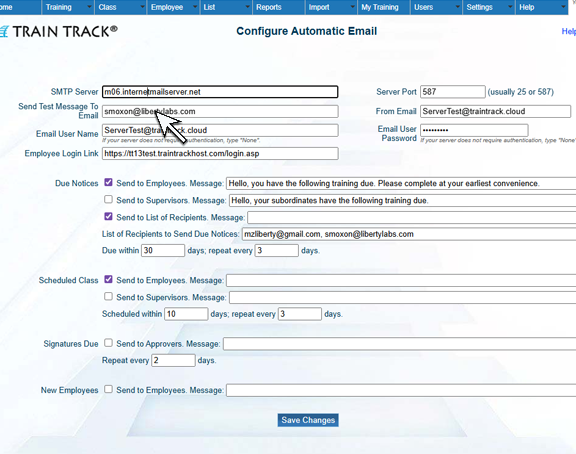 |
| 6. Type in the Login Link to send to employees. This will be a clickable link employees may use to log in. Enter letters or numbers as a Job Key. You will use this in step 11 below. | 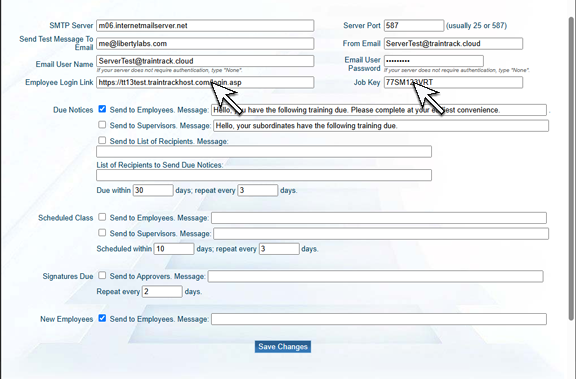 |
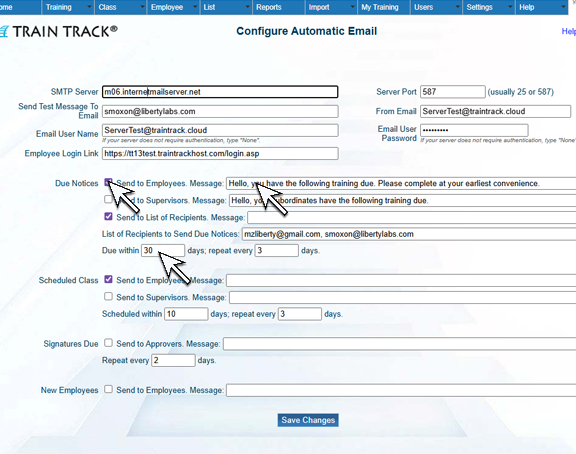
| 7. To enable the email notices, check the boxes for which type of notices you want to send. Type in the number of days due or scheduled within to send notices, and after how many days to repeat the notices.
You may leave the message field blank to use the default message text, or type in any message you want sent with the notices.
To disable notices, uncheck the box next to the type of notice you wish to disable. |
 |
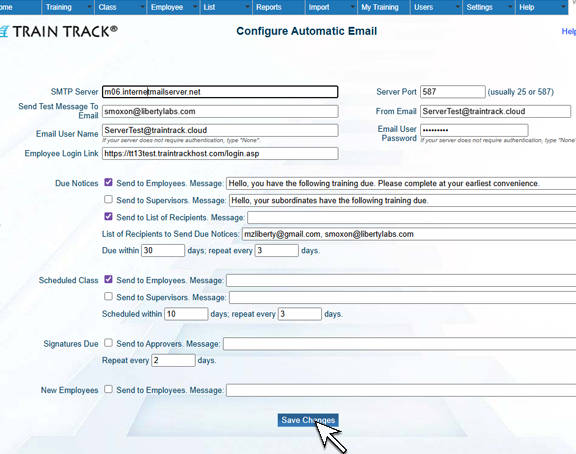
8. Click Save Changes. Employees with training due will receive a single email with training listed. Supervisors will receive an email with their subordinates and training due listed. New employees added within the last 30 days will get notices. |
 |
| 9. Open Windows Task Scheduler. Under "Actions", select Create Basic Task. | 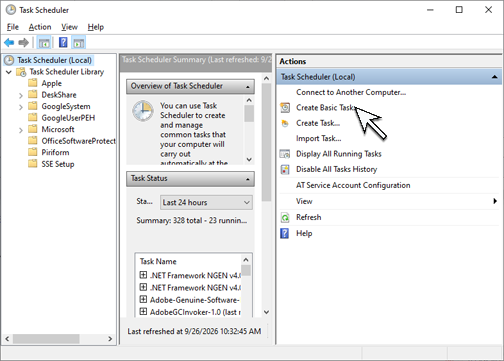 |
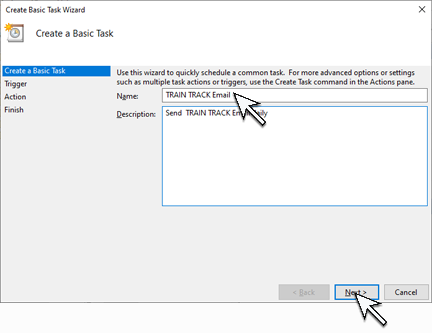
10. Enter a Name and optional Description and click Next.
|
 |
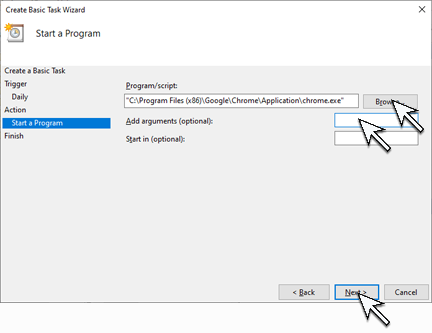
11. Click Browse and browse to your web browser (for example, Chrome) and click Open. Next to "Add Arguments", paste in your TRAIN TRACK® URL followed by "/AutoEmailJob.cshtml?Key=" and your Job Key. For example: https://MyDomain.TRAINTRACK.com/AutoEmailJob.cshtml?Key=MyJobKey Click Finish. |
 |
| 12. Select the job and click Properties. Select Run whether user is logged on or not. Click Change User or Group. | 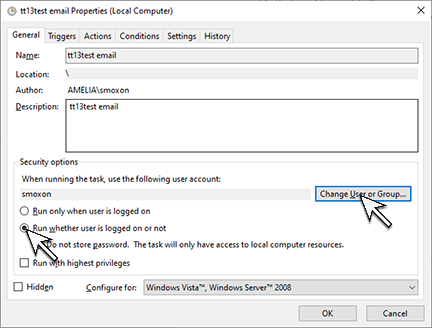 |
| 13. Click Advanced. Click Search. Select your user name and click OK. Enter your password when prompted. | 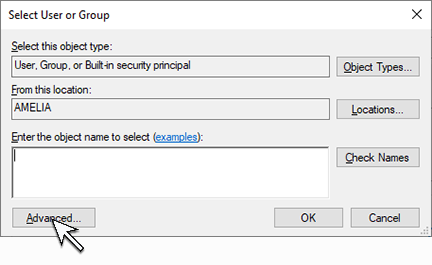 |
| 14. Right-click on the task and click Run to test it. | 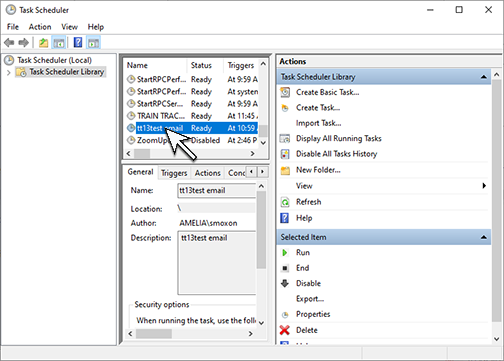 |
Send a Test Message
To make sure your settings are correct, you may send a test message to the address you entered for "Send Test Message To Email" as described above. Once you receive the test email, you will know that your mail server is configured correctly, and you are ready to send messages.
To send a test message, follow these steps
2. Click the link Send a Test Message. A test email will automatically be sent
Send Mail Now
Notices are designed to be sent once per day, but if you want to send them again, click Send Notices Now from the email setup page.
View Notices
You may view the notices to be sent, or the notices recently sent, by clicking the links at the bottom of the screen.
Add Class to Calendar
When scheduled class notices are sent to employees, they will include a link to add the class to their calendar. This feature works with most modern calendar applications.